
基于faster RCNN 目标检测-车牌定位(1)
最近一直在学习深度学习中的目标检测-主要研究的是车牌定位,用过传统的方法,YOLO等,YOLO效果不是很好,但是YOLO训练起来很慢,3000左右的数据集需要训练大概10多个小时。而且效果不是很好。改进的话不是特别好改。于是又开始研究faster RCNN ,训练也是巨慢的。没办法,必须实验才知道效果,哪个更好。目标检测最难的不是网络环境搭建,而是数据集的制作。下面开始我们的faster rcnn
最近一直在学习深度学习中的目标检测-主要研究的是车牌定位,用过传统的方法,YOLO等,YOLO效果不是很好,但是YOLO训练起来很慢,3000左右的数据集需要训练大概10多个小时。而且效果不是很好。改进的话不是特别好改。于是又开始研究faster RCNN ,训练也是巨慢的。没办法,必须实验才知道效果,哪个更好。目标检测最难的不是网络环境搭建,而是数据集的制作。下面开始我们的faster rcnn实战之旅吧。
step1:数据集的准备和源代码的下载。
源码下载 :https://github.com/jinfagang/keras_frcnn
下好的源代码放在pycharm工程目录中
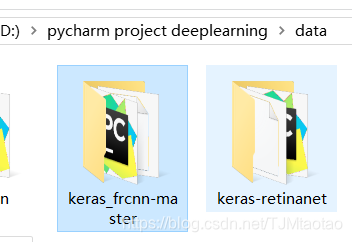
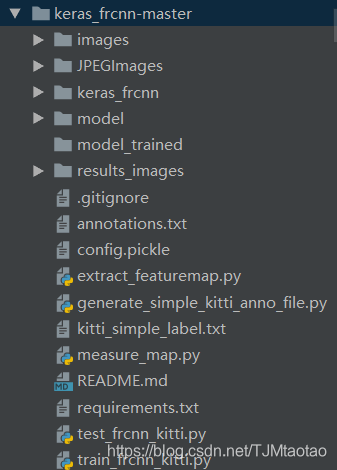
以下是源码的目录详情(下载好的代码文件夹没有这么多,少了的话需要自己添加)
训练数据 annotation格式如下:
JPEGImages\1.jpg,282,385,436,412,plate
改格式对应的是图片的相对路径,是按照voc数据集来的。
具体用到的代码如下:
# -*- coding:utf-8 -*-

import csv
import os
import glob
import sys


class PascalVOC2CSV(object):
    def __init__(self, xml=[], ann_path='./annotations.csv', classes_path='./classes.csv'):
        '''
        :param xml: 所有Pascal VOC的xml文件路径组成的列表
        :param ann_path: ann_path
        :param classes_path: classes_path
        '''
        self.xml = xml
        self.ann_path = ann_path
        self.classes_path = classes_path
        self.label = []
        self.annotations = []

        self.data_transfer()
        self.write_file()

    def data_transfer(self):
        for num, xml_file in enumerate(self.xml):
            try:
                # print(xml_file)
                # 进度输出
                sys.stdout.write('\r>> Converting image %d/%d' % (
                    num + 1, len(self.xml)))
                sys.stdout.flush()

                with open(xml_file, 'r') as fp:
                    for p in fp:
                        if '<filename>' in p:
                            self.filen_ame = p.split('>')[1].split('<')[0]

                        if '<object>' in p:
                            # 类别
                            d = [next(fp).split('>')[1].split('<')[0] for _ in range(9)]
                            self.supercategory = d[0]
                            if self.supercategory not in self.label:
                                self.label.append(self.supercategory)

                            # 边界框
                            x1 = int(d[-4]);
                            y1 = int(d[-3]);
                            x2 = int(d[-2]);
                            y2 = int(d[-1])

                            self.annotations.append(
                                [os.path.join('JPEGImages', self.filen_ame), x1, y1, x2, y2, self.supercategory])
            except:
                continue

        sys.stdout.write('\n')
        sys.stdout.flush()

    def write_file(self, ):
        with open(self.ann_path, 'w', newline='') as fp:
            csv_writer = csv.writer(fp, dialect='excel')
            csv_writer.writerows(self.annotations)

        class_name = sorted(self.label)
        class_ = []
        for num, name in enumerate(class_name):
            class_.append([name, num])
        with open(self.classes_path, 'w', newline='') as fp:
            csv_writer = csv.writer(fp, dialect='excel')
            csv_writer.writerows(class_)


xml_file = glob.glob('./Annotations/*.xml')

PascalVOC2CSV(xml_file)
这个代码会把用labelme标注好的数据写入到Annotations.csv中,之后用excel或者用记事本打开另存为txt文件即可或者用提供的代码,可以参考这篇博客(https://blog.csdn.net/Houchaoqun_XMU/article/details/78529069)如果直接用上面的代码就不用参考了。
JPEGImages\1.jpg,282,385,436,412,plate 转换好的数据都是这样的一行一行排列的,有多个类的情况也是一样的,只是最后的plate不一样而已。
step2 好了数据准备差不多了,开始理解代码吧,首先我们就从训练代码开始(train_frcnn_kitti.py)
先把代码粘贴过来吧,方便查看。
train_frcnn_kitti.py 代码如下
"""
this code will train on kitti data set
"""
from __future__ import division
import random
import pprint
import sys
import time
import numpy as np
import pickle
from keras import backend as K
from keras.optimizers import Adam, SGD, RMSprop
from keras.layers import Input
from keras.models import Model
from keras_frcnn import config, data_generators
from keras_frcnn import losses as losses_fn
import keras_frcnn.roi_helpers as roi_helpers
from keras.utils import generic_utils
import os
from keras_frcnn import resnet as nn
from keras_frcnn.simple_parser import get_data


def train_kitti():
    # config for data argument
    cfg = config.Config()

    cfg.use_horizontal_flips = False
    cfg.use_vertical_flips = False
    cfg.rot_90 = False
    cfg.num_rois = 32
    cfg.base_net_weights = os.path.join('./model/', nn.get_weight_path())

    # TODO: the only file should to be change for other data to train
    #cfg.model_path = './model/kitti_frcnn_last.hdf5'
    cfg.model_path = './model/resnet50_weights_tf_dim_ordering_tf_kernels.h5'
    #cfg.simple_label_file = 'kitti_simple_label.txt'
    cfg.simple_label_file = 'annotations.txt'
    all_images, classes_count, class_mapping = get_data(cfg.simple_label_file)

    if 'bg' not in classes_count:
        classes_count['bg'] = 0
        class_mapping['bg'] = len(class_mapping)

    cfg.class_mapping = class_mapping
    with open(cfg.config_save_file, 'wb') as config_f:
        pickle.dump(cfg, config_f)
        print('Config has been written to {}, and can be loaded when testing to ensure correct results'.format(
            cfg.config_save_file))

    inv_map = {v: k for k, v in class_mapping.items()}

    print('Training images per class:')
    pprint.pprint(classes_count)
    print('Num classes (including bg) = {}'.format(len(classes_count)))
    random.shuffle(all_images)
    num_imgs = len(all_images)
    train_imgs = [s for s in all_images if s['imageset'] == 'trainval']
    val_imgs = [s for s in all_images if s['imageset'] == 'test']

    print('Num train samples {}'.format(len(train_imgs)))
    print('Num val samples {}'.format(len(val_imgs)))

    data_gen_train = data_generators.get_anchor_gt(train_imgs, classes_count, cfg, nn.get_img_output_length,
                                                   K.image_dim_ordering(), mode='train')
    data_gen_val = data_generators.get_anchor_gt(val_imgs, classes_count, cfg, nn.get_img_output_length,
                                                 K.image_dim_ordering(), mode='val')

    if K.image_dim_ordering() == 'th':
        input_shape_img = (3, None, None)
    else:
        input_shape_img = (None, None, 3)

    img_input = Input(shape=input_shape_img)
    roi_input = Input(shape=(None, 4))

    # define the base network (resnet here, can be VGG, Inception, etc)
    shared_layers = nn.nn_base(img_input, trainable=True)

    # define the RPN, built on the base layers
    num_anchors = len(cfg.anchor_box_scales) * len(cfg.anchor_box_ratios)
    rpn = nn.rpn(shared_layers, num_anchors)

    classifier = nn.classifier(shared_layers, roi_input, cfg.num_rois, nb_classes=len(classes_count), trainable=True)

    model_rpn = Model(img_input, rpn[:2])
    model_classifier = Model([img_input, roi_input], classifier)

    # this is a model that holds both the RPN and the classifier, used to load/save weights for the models
    model_all = Model([img_input, roi_input], rpn[:2] + classifier)

    try:
        print('loading weights from {}'.format(cfg.base_net_weights))
        model_rpn.load_weights(cfg.model_path, by_name=True)
        model_classifier.load_weights(cfg.model_path, by_name=True)
    except Exception as e:
        print(e)
        print('Could not load pretrained model weights. Weights can be found in the keras application folder '
              'https://github.com/fchollet/keras/tree/master/keras/applications')

    optimizer = Adam(lr=1e-5)
    optimizer_classifier = Adam(lr=1e-5)
    model_rpn.compile(optimizer=optimizer,
                      loss=[losses_fn.rpn_loss_cls(num_anchors), losses_fn.rpn_loss_regr(num_anchors)])
    model_classifier.compile(optimizer=optimizer_classifier,
                             loss=[losses_fn.class_loss_cls, losses_fn.class_loss_regr(len(classes_count) - 1)],
                             metrics={'dense_class_{}'.format(len(classes_count)): 'accuracy'})
    model_all.compile(optimizer='sgd', loss='mae')

    epoch_length = 1000
    num_epochs = int(cfg.num_epochs)
    iter_num = 0

    losses = np.zeros((epoch_length, 5))
    rpn_accuracy_rpn_monitor = []
    rpn_accuracy_for_epoch = []
    start_time = time.time()

    best_loss = np.Inf

    class_mapping_inv = {v: k for k, v in class_mapping.items()}
    print('Starting training')

    vis = True

    for epoch_num in range(num_epochs):

        progbar = generic_utils.Progbar(epoch_length)
        print('Epoch {}/{}'.format(epoch_num + 1, num_epochs))

        while True:
            try:

                if len(rpn_accuracy_rpn_monitor) == epoch_length and cfg.verbose:
                    mean_overlapping_bboxes = float(sum(rpn_accuracy_rpn_monitor)) / len(rpn_accuracy_rpn_monitor)
                    rpn_accuracy_rpn_monitor = []
                    print(
                        'Average number of overlapping bounding boxes from RPN = {} for {} previous iterations'.format(
                            mean_overlapping_bboxes, epoch_length))
                    if mean_overlapping_bboxes == 0:
                        print('RPN is not producing bounding boxes that overlap'
                              ' the ground truth boxes. Check RPN settings or keep training.')

                X, Y, img_data = next(data_gen_train)

                loss_rpn = model_rpn.train_on_batch(X, Y)

                P_rpn = model_rpn.predict_on_batch(X)

                result = roi_helpers.rpn_to_roi(P_rpn[0], P_rpn[1], cfg, K.image_dim_ordering(), use_regr=True,
                                                overlap_thresh=0.7,
                                                max_boxes=300)
                # note: calc_iou converts from (x1,y1,x2,y2) to (x,y,w,h) format
                X2, Y1, Y2, IouS = roi_helpers.calc_iou(result, img_data, cfg, class_mapping)

                if X2 is None:
                    rpn_accuracy_rpn_monitor.append(0)
                    rpn_accuracy_for_epoch.append(0)
                    continue

                neg_samples = np.where(Y1[0, :, -1] == 1)
                pos_samples = np.where(Y1[0, :, -1] == 0)

                if len(neg_samples) > 0:
                    neg_samples = neg_samples[0]
                else:
                    neg_samples = []

                if len(pos_samples) > 0:
                    pos_samples = pos_samples[0]
                else:
                    pos_samples = []

                rpn_accuracy_rpn_monitor.append(len(pos_samples))
                rpn_accuracy_for_epoch.append((len(pos_samples)))

                if cfg.num_rois > 1:
                    if len(pos_samples) < cfg.num_rois // 2:
                        selected_pos_samples = pos_samples.tolist()
                    else:
                        selected_pos_samples = np.random.choice(pos_samples, cfg.num_rois // 2, replace=False).tolist()
                    try:
                        selected_neg_samples = np.random.choice(neg_samples, cfg.num_rois - len(selected_pos_samples),
                                                                replace=False).tolist()
                    except:
                        selected_neg_samples = np.random.choice(neg_samples, cfg.num_rois - len(selected_pos_samples),
                                                                replace=True).tolist()

                    sel_samples = selected_pos_samples + selected_neg_samples
                else:
                    # in the extreme case where num_rois = 1, we pick a random pos or neg sample
                    selected_pos_samples = pos_samples.tolist()
                    selected_neg_samples = neg_samples.tolist()
                    if np.random.randint(0, 2):
                        sel_samples = random.choice(neg_samples)
                    else:
                        sel_samples = random.choice(pos_samples)

                loss_class = model_classifier.train_on_batch([X, X2[:, sel_samples, :]],
                                                             [Y1[:, sel_samples, :], Y2[:, sel_samples, :]])

                losses[iter_num, 0] = loss_rpn[1]
                losses[iter_num, 1] = loss_rpn[2]

                losses[iter_num, 2] = loss_class[1]
                losses[iter_num, 3] = loss_class[2]
                losses[iter_num, 4] = loss_class[3]

                iter_num += 1

                progbar.update(iter_num,
                               [('rpn_cls', np.mean(losses[:iter_num, 0])), ('rpn_regr', np.mean(losses[:iter_num, 1])),
                                ('detector_cls', np.mean(losses[:iter_num, 2])),
                                ('detector_regr', np.mean(losses[:iter_num, 3]))])

                if iter_num == epoch_length:
                    loss_rpn_cls = np.mean(losses[:, 0])
                    loss_rpn_regr = np.mean(losses[:, 1])
                    loss_class_cls = np.mean(losses[:, 2])
                    loss_class_regr = np.mean(losses[:, 3])
                    class_acc = np.mean(losses[:, 4])

                    mean_overlapping_bboxes = float(sum(rpn_accuracy_for_epoch)) / len(rpn_accuracy_for_epoch)
                    rpn_accuracy_for_epoch = []

                    if cfg.verbose:
                        print('Mean number of bounding boxes from RPN overlapping ground truth boxes: {}'.format(
                            mean_overlapping_bboxes))
                        print('Classifier accuracy for bounding boxes from RPN: {}'.format(class_acc))
                        print('Loss RPN classifier: {}'.format(loss_rpn_cls))
                        print('Loss RPN regression: {}'.format(loss_rpn_regr))
                        print('Loss Detector classifier: {}'.format(loss_class_cls))
                        print('Loss Detector regression: {}'.format(loss_class_regr))
                        print('Elapsed time: {}'.format(time.time() - start_time))

                    curr_loss = loss_rpn_cls + loss_rpn_regr + loss_class_cls + loss_class_regr
                    iter_num = 0
                    start_time = time.time()

                    if curr_loss < best_loss:
                        if cfg.verbose:
                            print('Total loss decreased from {} to {}, saving weights'.format(best_loss, curr_loss))
                        best_loss = curr_loss
                        model_all.save_weights(cfg.model_path)

                    break

            except Exception as e:
                print('Exception: {}'.format(e))
                # save model
                model_all.save_weights(cfg.model_path)
                continue
    print('Training complete, exiting.')


if __name__ == '__main__':
    train_kitti()
代码总体而言不是很难理解,我们一行一行代码理解
from __future__ import division
import random
import pprint
import sys
import time
import numpy as np
import pickle
from keras import backend as K
from keras.optimizers import Adam, SGD, RMSprop
from keras.layers import Input
from keras.models import Model
from keras_frcnn import config, data_generators
from keras_frcnn import losses as losses_fn
import keras_frcnn.roi_helpers as roi_helpers
from keras.utils import generic_utils
import os
from keras_frcnn import resnet as nn
from keras_frcnn.simple_parser import get_data
这里就是导入必要的模块 ,详细说明如下:
import random,这是导入随机数产生的函数
import pprint ,这是打印相关信息的函数
import sys ,这是系统相关的设置,可以参考python 代码https://docs.python.org/3.6/library/sys.html?highlight=sys#module-sys
import time ,这是时间函数,一般是计算程序执行的时间
import pickle,这是用于python特有的类型和python的数据类型间进行转换,简而言之就是数据转换要用到的
from keras import backend as K,这是keras后端设置
from keras.optimizers import Adam, SGD, RMSprop ,这是keras优化器,也就是更新参数用到的算法
from keras.layers import Input ,这是keras的输入数据形式
from keras.models import Model 这是keras构建网络模型要到的
from keras_frcnn import config, data_generators 这是导入自己写的的训练模型的参数和数据产生的方法
from keras_frcnn import losses as losses_fn 这是导入自己写的损失函数的计算方法,一般可以自己对损失函数进行优化,可以参考其他文献的损失函数进行修改。
import keras_frcnn.roi_helpers as roi_helpers 这是roi的一些操作
from keras.utils import generic_utils 这是Keras中的一些工具,主要还是对数据进行操作,可以查看Keras文档:https://keras-cn.readthedocs.io/en/latest/utils/
import os 系统文件等操作可以参考Python 中os模块的具体说明 https://docs.python.org/3/library/os.html?highlight=os#module-os
from keras_frcnn import resnet as nn这里是导入自己写的resnet模块,并重命名为nn,后面用到nn的地方就是resnet模块。
from keras_frcnn.simple_parser import get_data,这是获取数据的方法
基本上模块的导入咋们将的差不多了,下面我们接着看代码:
def train_kitti():
    # config for data argument
    cfg = config.Config()

    cfg.use_horizontal_flips = False
    cfg.use_vertical_flips = False
    cfg.rot_90 = False
    cfg.num_rois = 32
    cfg.base_net_weights = os.path.join('./model/', nn.get_weight_path())

    # TODO: the only file should to be change for other data to train
    #cfg.model_path = './model/kitti_frcnn_last.hdf5'
    cfg.model_path = './model/resnet50_weights_tf_dim_ordering_tf_kernels.h5'
    cfg.model_save ='./model_trained/model_frcnn.vgg.5'
    #cfg.simple_label_file = 'kitti_simple_label.txt'
    cfg.simple_label_file = 'annotations.txt'
    all_images, classes_count, class_mapping = get_data(cfg.simple_label_file)
这个train_frcnn_kitti.py其实只写了一个函数实现,但是里面有调用超多的自定义的函数和参数以及第三方函数
上面这个 cfg = config.Config()是一般的参数设置函数调用,我们具体看看config.py中的具体实现吧
from keras import backend as K


class Config:
    def __init__(self):
        self.verbose = True

        self.network = 'resnet50'

        # setting for data augmentation #数据增强
        self.use_horizontal_flips = False #水平翻转,这里设置不
        self.use_vertical_flips = False # #垂直翻转,这里不
        self.rot_90 = False#翻转90度,这里设置不,一般我们车牌的数据不会设置这个参数。

        # anchor box scales
        self.anchor_box_scales = [128, 256, 512]  #这里是我们的锚框的尺度,这里就是三种尺度,和三种缩放比例对应

        # anchor box ratios
        self.anchor_box_ratios = [[1, 1], [1, 2], [2, 1]] #这里就是缩放比例,长宽比,一个锚点对应9种框

        # size to resize the smallest side of the image,
        self.im_size = 600 #图像最小的边的尺寸

        # image channel-wise mean to subtract #三个通道的像素值均值
        self.img_channel_mean = [103.939, 116.779, 123.68]
        self.img_scaling_factor = 1.0 #图像缩放因子,这里为1就是不缩放

        # number of ROIs at once
        self.num_rois = 4 #roi数量4个

        # stride at the RPN (this depends on the network configuration)
        self.rpn_stride = 16 #这里设置需要根据网络来,后面我们再来学习吧,源代码有重新设置为32

        self.balanced_classes = False #平衡类,这里不平衡,不知道这个参数干吗的,后面学习了再更新好了。

        # scaling the stdev #这里的参数一般都不要再改了,这是方差,和其对应的缩放因子
        self.std_scaling = 4.0
        self.classifier_regr_std = [8.0, 8.0, 4.0, 4.0]

        # overlaps for RPN       #这里就是RPN,区域推荐网络中算重叠iou的时候要用到,看是否框到物体,最小的重叠iou就是0.3,最大的重叠iou就是0.7。这个一般不建议修改了。
        self.rpn_min_overlap = 0.3
        self.rpn_max_overlap = 0.7

        # overlaps for classifier ROIs#这里就是计算分类,看你是这个类的时候要用到,分类网络要用到,最小的iou是0.1,最大是0.5,一般也是不建议修改,直接用就好了。
        self.classifier_min_overlap = 0.1
        self.classifier_max_overlap = 0.5

        # placeholder for the class mapping, automatically generated by the parser
        self.class_mapping = None #类对应产生的特征图。

        # location of pretrained weights for the base network
        # weight files can be found at:
        # https://github.com/fchollet/deep-learning-models/releases/download/v0.2/resnet50_weights_th_dim_ordering_th_kernels_notop.h5
        # https://github.com/fchollet/deep-learning-models/releases/download/v0.2/resnet50_weights_tf_dim_ordering_tf_kernels_notop.h5

        self.model_path = 'model_trained/model_frcnn.vgg.hdf5' #预训练模型,这里我们进行了更改,我们还没有训练好模型,这里的模型用的是resnet50_weights_th_dim_ordering_th_kernels.h5模型,如果要用其他模型需要自己修改基础网络,nn调用那里,然后预训练模型也要更改。

        self.model_save ='model_trained/model_frcnn_resnet_30.h5' #这里是保存训练的模型
        # params add by me
        self.data_dir = '.data/' 这个没有用,用不到
        self.num_epochs = 30  #迭代次数

        self.kitti_simple_label_file = 'kitti_simple_label.txt'#这个没有用到

        # TODO: this field is set to simple_label txt, which in very simple format like:
        # TODO: /path/image_2/000000.png,712.40,143.00,810.73,307.92,Pedestrian, see kitti_simple_label.txt for detail
        self.simple_label_file = 'simple_label.txt'#这个我们改成自己的训练文件即可

        self.config_save_file = 'config.pickle'#这个默认就好
在 fit 和 evaluate 中 都有 verbose 这个参数,下面详细说一下
fit 中的 verbose
verbose:日志显示
verbose = 0 为不在标准输出流输出日志信息
verbose = 1 为输出进度条记录
verbose = 2 为每个epoch输出一行记录
注意: 默认为 1
verbose = 0,在控制台没有任何输出
verbose = 1 :显示进度条 #我们就是用的这个,显示进度条的。
self.network = 'resnet50'设置基础网络,就是resnet50了。
其他参数具体看我上面的注释吧、
cfg.simple_label_file = 'annotations.txt' #这个就是我们的训练。
all_images, classes_count, class_mapping = get_data(cfg.simple_label_file)#这就是得到所有图片,图片数量,图片类别

if 'bg' not in classes_count:
    classes_count['bg'] = 0
    class_mapping['bg'] = len(class_mapping)

cfg.class_mapping = class_mapping
with open(cfg.config_save_file, 'wb') as config_f:
    pickle.dump(cfg, config_f)
    print('Config has been written to {}, and can be loaded when testing to ensure correct results'.format(
        cfg.config_save_file))

inv_map = {v: k for k, v in class_mapping.items()}

print('Training images per class:')
pprint.pprint(classes_count)
print('Num classes (including bg) = {}'.format(len(classes_count)))
我们来具体看看get_data函数的具体实现,代码如下:
import cv2
import numpy as np


def get_data(input_path):
    found_bg = False
    all_imgs = {}

    classes_count = {}

    class_mapping = {}

    visualise = True

    with open(input_path, 'r') as f:

        print('Parsing annotation files')

        for line in f:
            line_split = line.strip().split(',')
            (filename, x1, y1, x2, y2, class_name) = line_split

            if class_name not in classes_count:
                classes_count[class_name] = 1
            else:
                classes_count[class_name] += 1

            if class_name not in class_mapping:
                if class_name == 'bg' and not found_bg:
                    print('Found class name with special name bg. Will be treated as a'
                          ' background region (this is usually for hard negative mining).')
                    found_bg = True
                class_mapping[class_name] = len(class_mapping)

            if filename not in all_imgs:
                all_imgs[filename] = {}

                img = cv2.imread(filename)
                (rows, cols) = img.shape[:2]
                all_imgs[filename]['filepath'] = filename
                all_imgs[filename]['width'] = cols
                all_imgs[filename]['height'] = rows
                all_imgs[filename]['bboxes'] = []
                if np.random.randint(0, 6) > 0:
                    all_imgs[filename]['imageset'] = 'trainval'
                else:
                    all_imgs[filename]['imageset'] = 'test'

            all_imgs[filename]['bboxes'].append(
                {'class': class_name, 'x1': int(float(x1)), 'x2': int(float(x2)), 'y1': int(float(y1)),
                 'y2': int(float(y2))})

        all_data = []
        for key in all_imgs:
            all_data.append(all_imgs[key])

        # make sure the bg class is last in the list
        if found_bg:
            if class_mapping['bg'] != len(class_mapping) - 1:
                key_to_switch = [key for key in class_mapping.keys() if class_mapping[key] == len(class_mapping) - 1][0]
                val_to_switch = class_mapping['bg']
                class_mapping['bg'] = len(class_mapping) - 1
                class_mapping[key_to_switch] = val_to_switch

        return all_data, classes_count, class_mapping
#数据最后的形式,之后补充。
更多推荐


 2
2 0
0- 0


 已为社区贡献5条内容

所有评论(0)