
朴素贝叶斯(深度学习)
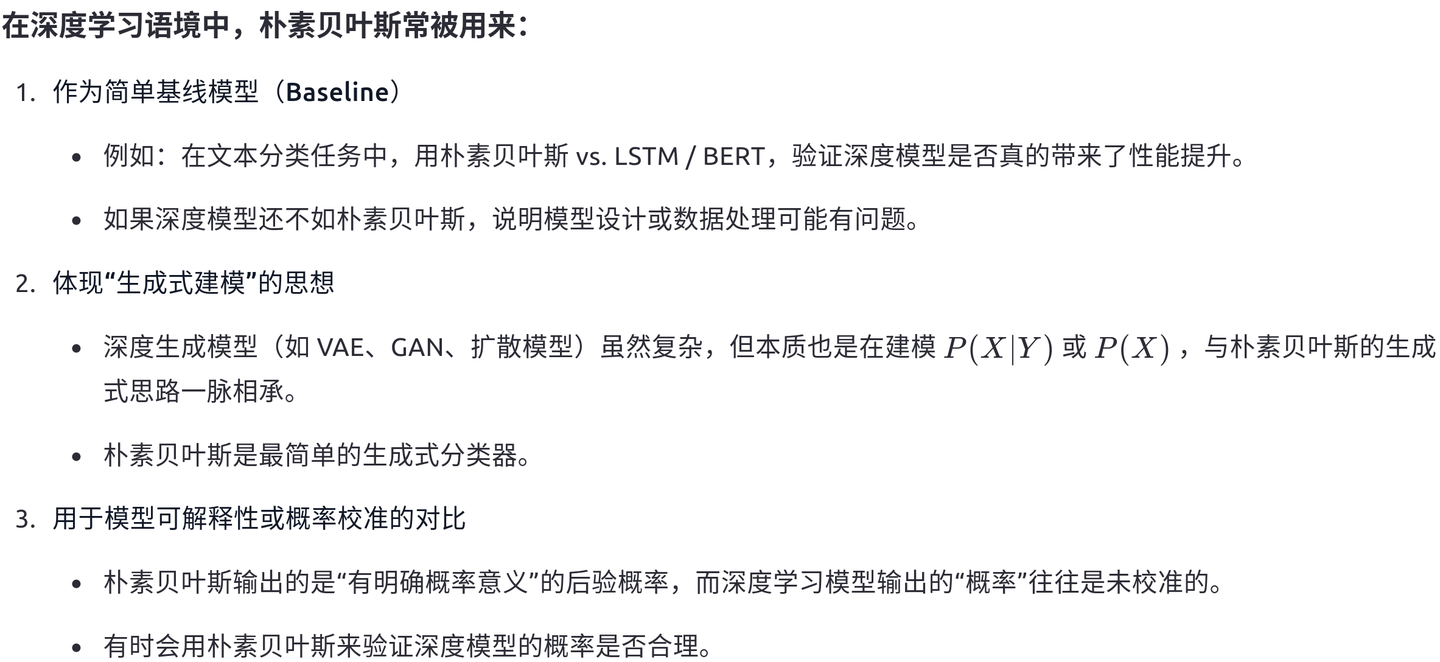
深度学习的朴素贝叶斯:
1.使用深度学习模型来提取特征,然后将这些特征输入到朴素贝叶斯分类器中进行分类。√
2.在深度神经网络中,使用朴素贝叶斯的原理(如条件独立性假设)来设计新的层或损失函数
一、概念与场景
1.review Naive Bayes
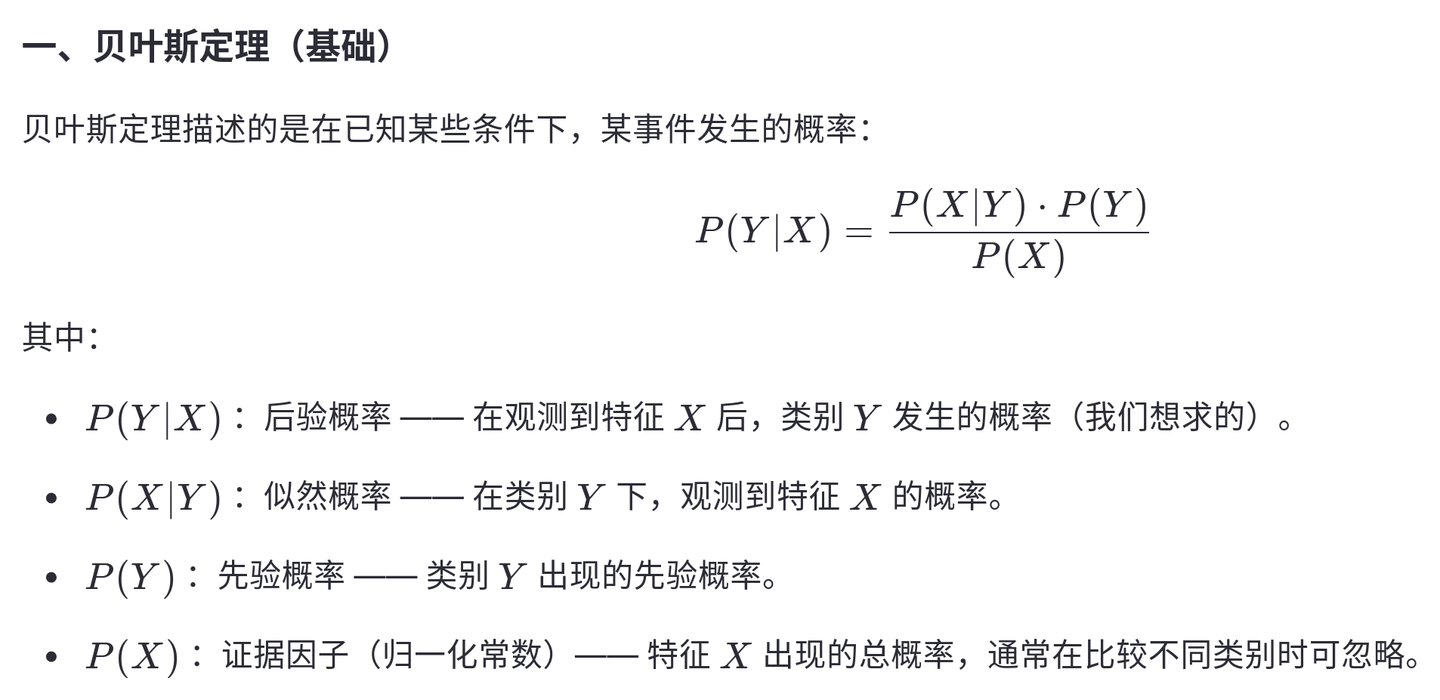
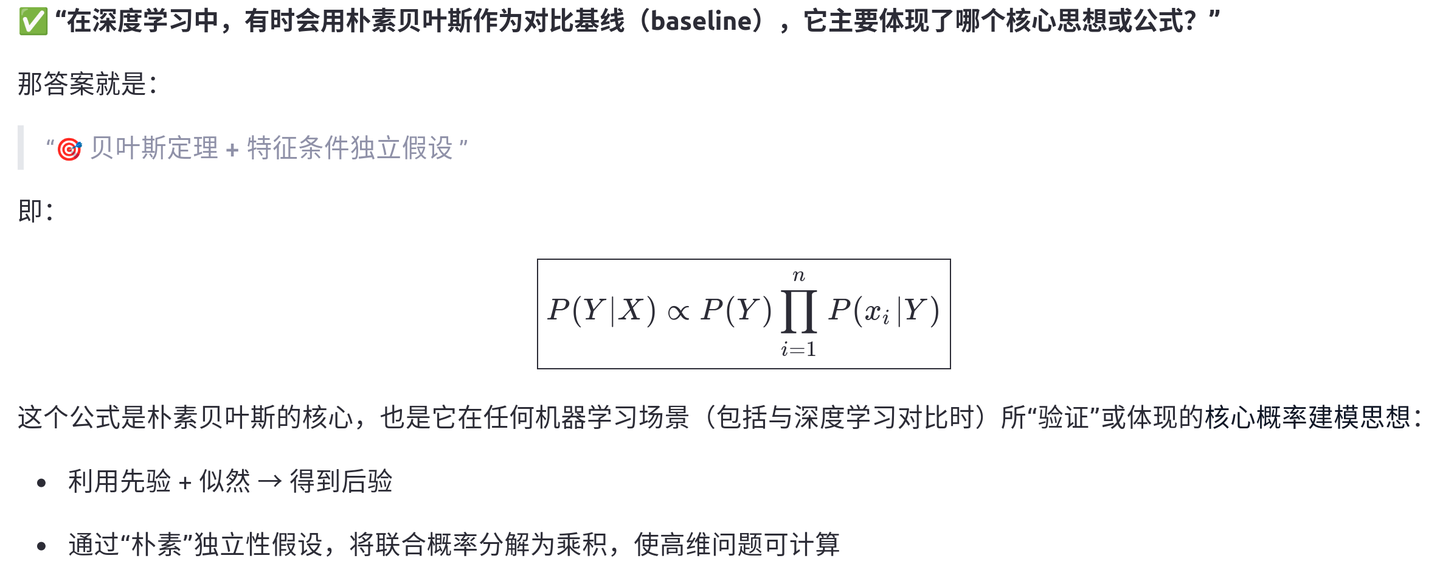
是什么:它是一种基于贝叶斯定理和特征条件独立性假设的概率分类算法(简单,高效,适合高维数据集)
“朴素”在哪里:它假设所有特征之间是相互独立的。这是一个非常强的假设,在现实中很少成立,但神奇的是,它在很多场景下效果非常好。
添加图片注释,不超过 140 字(可选)
添加图片注释,不超过 140 字(可选)
添加图片注释,不超过 140 字(可选)
2.与深度学习的结合:Hybrid模型
思路:深度神经网络(尤其是卷积神经网络CNN和自动编码器Autoencoder)是强大的特征提取器。它们可以将原始数据(如图像、文本)转换为一个更具代表性、更抽象的特征向量(Feature Vector)。
步骤1:使用一个深度学习模型(去掉最后的分类层)来提取输入数据的特征
步骤2:将提取到的特征(而不是原始数据)作为朴素贝叶斯分类器的输入。
为什么这么做:
1.优势互补:深度学习自动学习高级特征,克服了手工设计特征的难点。朴素贝叶斯计算高效,在小样本上也能工作良好,并且能提供概率输出。
2.场景:数据稀缺(当有少量的标注数据时,单独训练一个深层的神经网络容易过拟合。先用大量无标签数据或预训练模型(如在 ImageNet 上预训练的模型)来学习一个好的特征提取器,然后用少量标注数据在这个特征之上训练一个简单的朴素贝叶斯分类器,是一个非常有效的策略。)、可解释性(相比深度神经网络的“黑箱”,朴素贝叶斯能提供“某个样本属于某个类别的概率”,在某些需要概率解释的场景下更有优势)、计算效率(训练好的特征提取和分类可以非常快)
二、代码(以图像分类为例)
目的:实现一个经典的Hybrid模型-->使用预训练的VGG16网络提取图像特征-->使用高斯朴素贝叶斯进行分类
场景:CIFAR-10图像分类
CIFAR-10数据集包含10个类别的6万张32x32彩色照片。
# 导入必要的库
import numpy as np
import matplotlib.pyplot as plt
from sklearn.model_selection import train_test_split
from sklearn.naive_bayes import GaussianNB
from sklearn.metrics import accuracy_score, classification_report, confusion_matrix
from sklearn.datasets import fetch_openml
# 对于 TensorFlow 2.x
import tensorflow as tf
from tensorflow.keras.applications import VGG16
from tensorflow.keras.applications.vgg16 import preprocess_input
from tensorflow.keras.preprocessing.image import img_to_array, array_to_img
from tensorflow.keras.datasets import cifar10

# 1. 加载数据
(x_train, y_train), (x_test, y_test) = cifar10.load_data()

# 为了演示速度,我们使用一个子集
num_samples = 5000
x_train, y_train = x_train[:num_samples], y_train[:num_samples].ravel()
x_test, y_test = x_test[:1000], y_test[:1000].ravel()

# CIFAR-10 的类别名称
class_names = ['airplane', 'automobile', 'bird', 'cat', 'deer', 'dog', 'frog', 'horse', 'ship', 'truck']

print(f"训练集形状: {x_train.shape}")
print(f"测试集形状: {x_test.shape}")

# 2. 使用预训练的深度学习模型 (VGG16) 提取特征
# 加载预训练的 VGG16 模型,不包括顶部的全连接层
base_model = VGG16(weights='imagenet', include_top=False, input_shape=(32, 32, 3)) # VGG16 原始输入是 224x224,但我们这里用 32x32
# 加载在ImageNet数据集上预训练好的权重;include_top=False:不要最后的全连接层
print("VGG16 基础模型加载完毕。")

# 自定义函数:使用预训练模型提取特征
def extract_features(images, model):
    """
    使用预训练模型从一批图像中提取特征。

    参数:
        images: 输入图像数组 (n_samples, height, width, channels)
        model: 预训练的 Keras 模型

    返回:
        features: 提取的特征向量 (n_samples, n_features)
    """
    # 图像预处理 (VGG16 特定的预处理)
    images_preprocessed = preprocess_input(images)
    # 通过模型前向传播获取特征
    features = model.predict(images_preprocessed, verbose=0)
    # 将 4D 输出 (samples, height, width, channels) 展平为 2D (samples, features)
    features = features.reshape(features.shape[0], -1)
    return features

print("开始从训练集提取特征...")
train_features = extract_features(x_train, base_model)
print("开始从测试集提取特征...")
test_features = extract_features(x_test, base_model)

print(f"提取后的训练特征形状: {train_features.shape}")
print(f"提取后的测试特征形状: {test_features.shape}")

# 3. 训练高斯朴素贝叶斯分类器
# 注意:GaussianNB 假设特征服从正态分布,适用于连续值特征。
gnb = GaussianNB() #初始化
print("开始训练朴素贝叶斯分类器...")
gnb.fit(train_features, y_train) #训练

# 4. 在测试集上进行预测
print("开始在测试集上进行预测...")
y_pred = gnb.predict(test_features)
y_pred_prob = gnb.predict_proba(test_features) # 获取概率预测

# 5. 评估模型
accuracy = accuracy_score(y_test, y_pred)
print(f"\n测试集准确率: {accuracy:.4f}")

print("\n分类报告:")
print(classification_report(y_test, y_pred, target_names=class_names))

# 6. 可视化一些预测结果
def plot_predictions(images, true_labels, pred_labels, pred_probs, class_names, num_images=5):
    plt.figure(figsize=(12, 6))
    for i in range(num_images):
        plt.subplot(1, num_images, i+1)
        plt.imshow(images[i]) # CIFAR-10 图像已经是 0-255 范围,无需反归一化
        true_name = class_names[true_labels[i]]
        pred_name = class_names[pred_labels[i]]
        pred_prob = pred_probs[i].max()
        plt.title(f'True: {true_name}\nPred: {pred_name}\nProb: {pred_prob:.2f}', fontsize=10)
        plt.axis('off')
    plt.tight_layout()
    plt.show()

# 选择测试集的前几个样本进行可视化
plot_predictions(x_test[:5], y_test[:5], y_pred[:5], y_pred_prob[:5], class_names)

# (可选) 7. 与传统方法对比:直接在原始像素上使用朴素贝叶斯
print("\n--- 对比: 直接在原始像素上使用朴素贝叶斯 ---")
x_train_flat = x_train.reshape(x_train.shape[0], -1)
x_test_flat = x_test.reshape(x_test.shape[0], -1)

gnb_pixel = GaussianNB()
gnb_pixel.fit(x_train_flat, y_train)
y_pred_pixel = gnb_pixel.predict(x_test_flat)
accuracy_pixel = accuracy_score(y_test, y_pred_pixel)
print(f"原始像素特征的测试集准确率: {accuracy_pixel:.4f}")
print("可以看到,使用深度学习提取的高级特征远远优于原始像素。")
总结:
何时使用?:
-
当你有一个小的标注数据集,但有一个相关的大型预训练模型时。
-
当你需要快速的训练和推理,同时又不想牺牲太多精度时。
-
当你不仅需要预测类别,还需要预测概率时。
-
适用于各种任务:图像分类、文本分类(可以用 BERT 提取特征 + 朴素贝叶斯)、音频分析等。
更多推荐



 8
8 0
0- 0


 已为社区贡献1条内容

所有评论(0)