
python 实时rtsp识别_Python+opencv实现摄像头实时人脸识别和图片识别!太强了
一、实现摄像头实时识别import cv2import timecap = cv2.VideoCapture(0)# 调用第一个摄像头cv2.namedWindow('v')# 人脸特征分类器face_cascade = cv2.CascadeClassifier('C:/ProgramData/Anaconda3/Lib/site-packages/cv2/data/haarcascade_..
·
一、实现摄像头实时识别
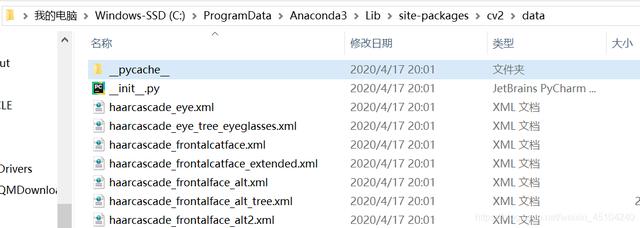
import cv2import timecap = cv2.VideoCapture(0) # 调用第一个摄像头cv2.namedWindow('v')# 人脸特征分类器face_cascade = cv2.CascadeClassifier('C:/ProgramData/Anaconda3/Lib/site-packages/cv2/data/haarcascade_frontalface_default.xml')# 循环识别while True: ret, frame = cap.read() grey = cv2.cvtColor(frame, cv2.COLOR_BGR2GRAY) faces = face_cascade.detectMultiScale(grey, 1.3, 5) # 人脸处理,画矩形图像 for (x, y, w, h) in faces: cv2.rectangle(frame, (x, y), (x + w, y + h), (255, 0, 0), 2) # 显示图像以及窗口关闭 cv2.imshow('人脸识别', frame) flag = cv2.waitKey(1) if flag == 27:#按下ESC键退出 break# 销毁窗口cv2.destroyAllWindows()特别提醒:代码中cv2.CascadeClassifier(“xml文件路径”)必须替换成自己电脑上相应文件路径,我刚学习的时候也不知道我的文件路径在哪里,这里把我的解决方法分享给大家。
1.解决方法:
(1)打开python编译环境(2)输入
import sysprint(sys.path)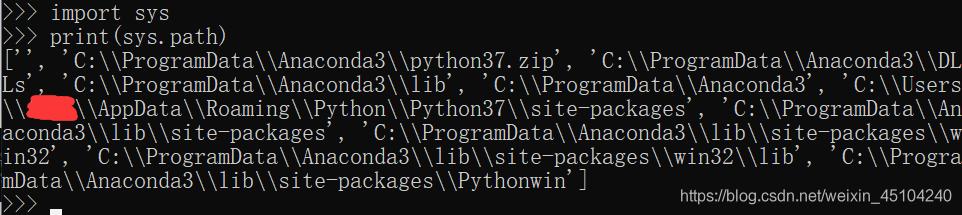
(4) 找到之后我们复制路径,将代码中的部分路径 进行替换。
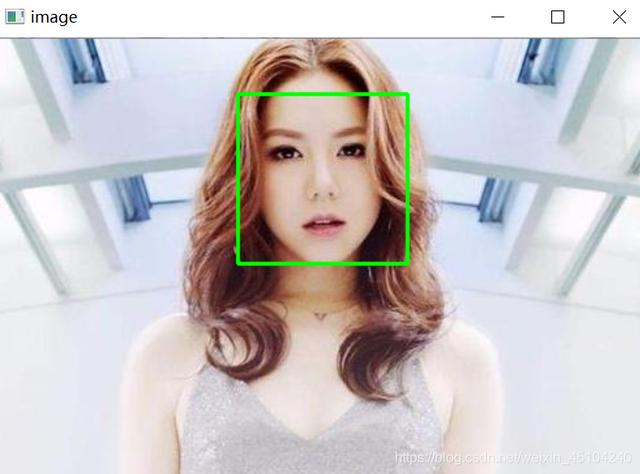
二、实现图片识别
#图片检测 - OpenCV版本import cv2import timefilepath = "oc.jpg"# OpenCV人脸识别分类器classifier = cv2.CascadeClassifier( "C:/ProgramData/Anaconda3/Lib/site-packages/cv2/data/haarcascade_frontalface_default.xml")#记下 程序开始时间t=time.time()img = cv2.imread(filepath) # 读取图片gray = cv2.cvtColor(img, cv2.COLOR_BGR2GRAY) # 转换灰色color = (0, 255, 0) # 定义绘制颜色# 调用识别人脸faceRects = classifier.detectMultiScale( gray, scaleFactor=1.2, minNeighbors=3, minSize=(32, 32))if len(faceRects): # 大于0则检测到人脸 for faceRect in faceRects: # 单独框出每一张人脸 x, y, w, h = faceRect # 框出人脸 cv2.rectangle(img, (x, y), (x + h, y + w), color, 2)print('运行时间{}'.format(time.time()-t))cv2.imshow("image", img) # 显示图像cv2.waitKey(0) #等待按键#cv2.destroyAllWindows()time.sleep(5)代码中的xml文件路径问题解决方法同上。放上我女神的图片,嘻嘻。
你学会了没!完整案例源码获取后台私信小编 源码 领取
更多推荐
 1
1 0
0- 0


 已为社区贡献2条内容

所有评论(0)